Jun 10, 2026 | HVAC
Does a Heat Pump Breakdown Always Mean Replacement?
No, most heat pump breakdowns do not mean you need a replacement. Many problems can be fixed with repairs, routine maintenance, or part replacement instead of a full system swap.
When your heat pump stops working or starts acting up, it’s easy to assume the worst. But in reality, heat pumps are made up of many components that can fail independently. A breakdown often means a part needs attention rather than the entire system reaching the end of its life. For example, a faulty capacitor, a dirty coil, or a stuck relay can all cause a system to stop heating or cooling effectively. These issues are common, and experienced HVAC contractors like North HVAC Services in Petaluma, CA, handle them every day. Unless the unit is very old or the cost of repair is close to the price of a new system, replacement is rarely your only option.
What Are the Most Frequent Heat Pump Issues That Don’t Require Replacement?
Most common heat pump problems do not call for a new system. They can usually be fixed with repairs or routine service.
- Thermostat Malfunction: Incorrect settings or a failed thermostat can prevent the system from running. Replacing or recalibrating usually solves this.
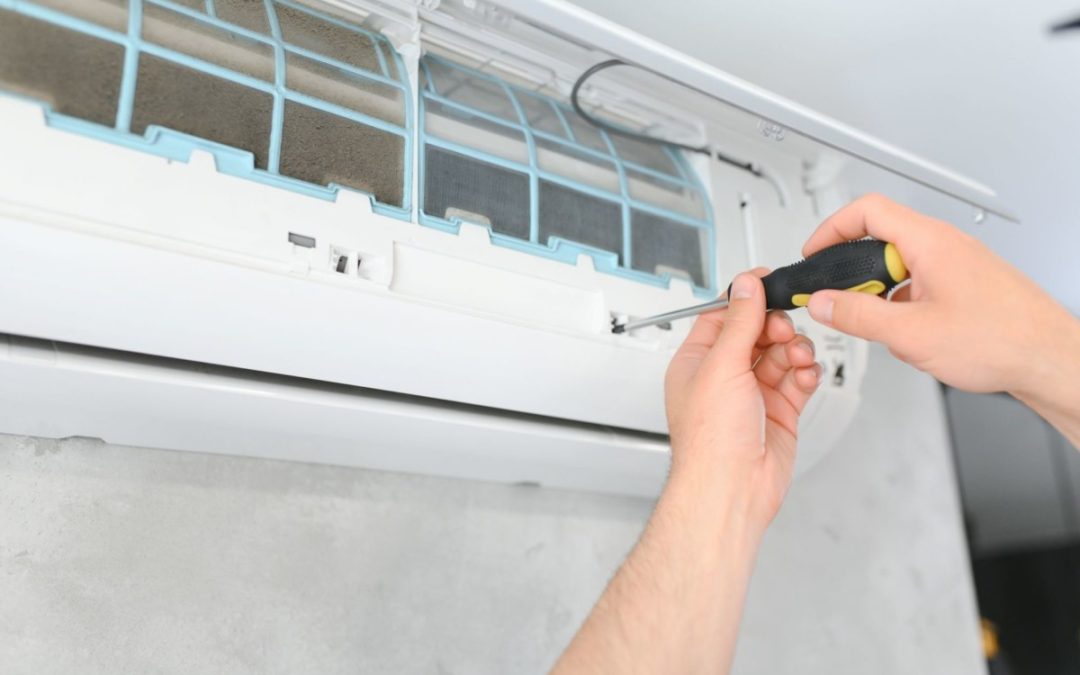
- Dirty or Clogged Filters: Blocked airflow makes the heat pump work harder and lowers efficiency. Cleaning or replacing filters restores performance.
- Tripped Breakers or Blown Fuses: Electrical issues often stop a heat pump from running. Resetting breakers or replacing fuses is a quick fix.
- Frozen Coils: Ice buildup on coils can result from dirty filters, low refrigerant, or airflow problems. Thawing and addressing the cause can restore normal function.
- Refrigerant Leaks: Low refrigerant can reduce heating/cooling. Sealing leaks and recharging refrigerant will often solve the issue.
- Faulty Capacitors or Relays: These electrical parts start the compressor and fans. Replacing a failed component gets the system running again.
- Blocked Outdoor Unit: Leaves or debris around the outdoor coil can restrict airflow. Clearing the area is usually all that’s needed.
These issues are routine for HVAC service teams. With prompt heat pump troubleshooting, most breakdowns are resolved without extensive repairs or full replacement.
For further reading, see [PDF] Aqua Comfort Heat Pump Troubleshooting from extnag.tacc.utexas.edu.
How to Approach Heat Pump Troubleshooting Before Deciding on Replacement
Start with basic troubleshooting steps to identify the problem before considering a full replacement. Often, simple checks can pinpoint the cause and save you time and money.
- Check the Thermostat: Ensure it’s set to the correct mode (heat or cool) and temperature. Replace batteries if needed.
- Inspect Air Filters: Dirty filters can block airflow. Clean or replace them if they look clogged.
- Look at the Circuit Breaker: Make sure the breaker for the heat pump hasn’t tripped. Reset if necessary.
- Examine the Outdoor Unit: Remove any debris, leaves, or snow blocking the unit. Good airflow is essential.
- Listen for Unusual Noises: Clicking, humming, or rattling can indicate a minor mechanical or electrical issue.
- Check for Ice: If you see ice on the coils, turn off the system and allow it to thaw. If it happens repeatedly, call a technician.
- Call a Professional: If the system still doesn’t work after these steps, a certified HVAC technician can perform advanced heat pump troubleshooting to diagnose and repair the issue.
These steps help rule out minor problems and can often get your system running again. If you’re unsure, North HVAC Services can help you with expert troubleshooting and honest advice.
Warning Signs That Point to Repair, Not Replacement
Certain symptoms suggest your heat pump simply needs repair, not full replacement. Recognizing these can save you significant costs.
- Sudden Loss of Heating or Cooling: If the system worked recently and stopped abruptly, it’s likely a single component failure.
- Short Cycling: If your heat pump turns on and off rapidly, a thermostat issue or clogged filter is often to blame.
- Unusual Noises: Buzzing, clicking, or rattling noises often come from loose parts or failing relays, not from system-wide problems.
- Frozen or Icy Coils: Ice buildup usually points to a filter, airflow, or refrigerant problem. Thawing and correcting the cause typically solves it.
- Inconsistent Temperatures: Uneven heating or cooling is often caused by minor electrical or thermostat issues, not a failing unit.
- Rising Energy Bills (Sudden): A sudden spike, as opposed to a gradual increase, often means a specific part is malfunctioning, not the whole system.
When you spot these issues, aim for targeted repairs first. Many business owners in Sonoma, Marin, and Napa counties have restored their comfort and savings with timely heat pump troubleshooting, avoiding unnecessary replacements.
When Does a Heat Pump Breakdown Actually Require a Replacement?
A full heat pump replacement is only necessary in certain situations: when the unit is very old, repairs are frequent and costly, or key components like the compressor fail.
If your system is over 12-15 years old and repairs are adding up, investing in a new heat pump may be more cost-effective than ongoing fixes. Similarly, if the compressor or heat exchanger fails—two of the most expensive parts—replacement is usually the smarter choice. Another sign is if your system uses outdated refrigerant (such as R-22), which is no longer produced; repairing leaks or recharging can become prohibitively expensive. Finally, if your unit can no longer heat or cool your building to a comfortable level, despite multiple repairs, it’s probably time to consider a new system. North HVAC Services helps business owners weigh these factors honestly, so you only replace your unit when it truly makes sense.
How Heat Pump Troubleshooting Saves You Money and Prevents Unnecessary Replacements
Thorough heat pump troubleshooting pinpoints the true cause of problems, helping you avoid costly and unnecessary system replacements. Most heat pump issues are isolated and repairable, so skipping troubleshooting can lead to expensive, avoidable decisions.
By identifying a faulty relay, refrigerant leak, or dirty filter, you might spend a fraction of the cost of a new system on the fix. Many business owners in the Petaluma area have saved thousands by choosing repair over replacement when appropriate. Troubleshooting also uncovers underlying issues—like poor maintenance or electrical faults—that, if left unaddressed, could damage a new system as well. A professional approach ensures you only invest in a new heat pump when it’s truly needed, keeping your operating costs low and your building comfortable year-round.
What Should You Do If Your Heat Pump Breaks Down in Sonoma, Marin, or Napa?
If your heat pump fails in Sonoma, Marin, or Napa counties, follow these steps to minimize downtime and costs:
- Check the Basics: Inspect the thermostat, circuit breaker, and air filters for obvious issues.
- Record Symptoms: Note any strange noises, smells, or visible signs like ice or water leaks.
- Turn Off the System: If you suspect electrical or refrigerant issues, switch the unit off to prevent further damage.
- Contact a Licensed HVAC Contractor: Reach out to a trusted provider like North HVAC Services at (415) 845-6910 for prompt heat pump troubleshooting.
- Share Details: Give your contractor as much information as possible to speed up diagnosis and repair.
- Consider Maintenance: If you haven’t serviced the system recently, schedule a full checkup to prevent future issues.
Taking these steps ensures a faster, more accurate diagnosis and can mean the difference between a quick repair and a costly replacement.
How North HVAC Services Helps You Avoid Unnecessary Heat Pump Replacements
North HVAC Services approaches every breakdown with a repair-first mindset. Their experienced technicians perform thorough heat pump troubleshooting to identify the exact issue. Only when repair is not practical or cost-effective will they suggest replacement.
They use advanced diagnostic tools and years of hands-on experience to find and fix common problems—like faulty relays, refrigerant leaks, or electrical failures—quickly and efficiently. Business owners throughout Petaluma, Sonoma, Marin, and Napa counties trust North HVAC Services for honest advice and clear explanations. If a repair will restore your system’s performance, you’ll know right away. If replacement is truly necessary, they’ll help you weigh your options and make the best decision for your budget and building.
Don’t let a heat pump breakdown disrupt your business or lead to unnecessary expenses. Call North HVAC Services at (415) 845-6910 for expert heat pump troubleshooting and honest solutions that fit your needs.
Frequently Asked Questions
What should I do if my heat pump stops working suddenly?
If your heat pump stops working, check your thermostat settings, circuit breakers, and air filters first. Many issues like tripped breakers, clogged filters, or thermostat errors can be fixed without professional help. If these steps don’t solve the problem, call a qualified HVAC contractor like North HVAC Services in Petaluma, CA for further troubleshooting.
How can I tell if my heat pump needs repair or full replacement?
Most heat pump problems only require repair, not replacement, unless your unit is very old or repairs are nearly as expensive as a new system. Common issues like faulty capacitors, dirty coils, or bad relays are often fixable. Have a technician inspect the system to determine the best course of action.
Why is my heat pump not heating or cooling properly?
If your heat pump isn’t heating or cooling well, check for dirty air filters, incorrect thermostat settings, or blocked outdoor units. Clearing debris and replacing filters can often restore performance. If the issue persists, contact a pro at (415) 845-6910 for diagnosis.
What are common heat pump problems I can fix myself?
You can usually handle simple issues like replacing air filters, resetting circuit breakers, and making sure the thermostat is set correctly. These basic steps solve many common heat pump problems. For anything more complex, it's safer to call a licensed HVAC technician.
How often should I schedule maintenance to prevent heat pump breakdowns?
It's best to schedule professional heat pump maintenance at least once a year to keep your system running smoothly. Regular servicing helps catch small issues before they lead to breakdowns. North HVAC Services can help you set up a maintenance schedule that fits your needs.

Jun 3, 2026 | HVAC, HVAC Maintenance
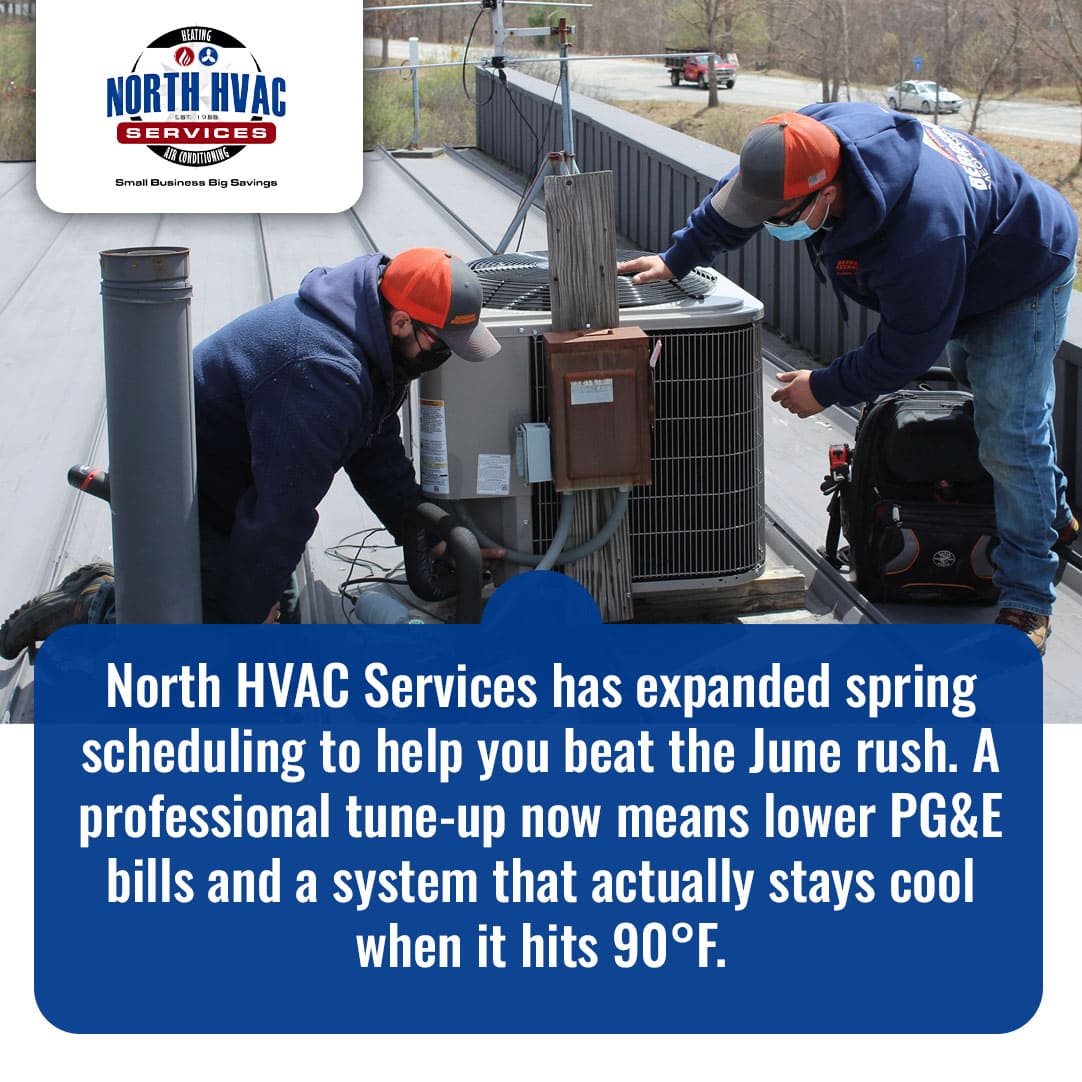
Marin County businesses have a short pre-summer window: typically May through early June, to inspect and service commercial HVAC systems before peak cooling demand arrives. North HVAC Services walks through a 12-point maintenance checklist, explains what a licensed commercial inspection covers, and breaks down the cost difference between scheduled service and an emergency repair call. If your property hasn’t had a pre-season inspection this spring, act now – before your calendar fills and temperatures climb.
Why Marin County Summers Push Commercial Cooling Systems to the Limit
Marin County’s climate carries more complexity than a standard California summer. Coastal communities – Mill Valley, Sausalito, Tiburon – often stay cool through much of the day under the Pacific marine layer. But inland areas, including San Rafael and Novato, regularly see temperatures climb into the mid-to-upper 90s during July and August heat events, often within hours of a cool morning fog burn-off.
According to WeatherSpark’s climate data for San Rafael, the region’s hot season runs from late June through September, with peak afternoon temperatures typically occurring between 2 and 5 PM, precisely when retail floors, restaurant dining rooms, and office buildings carry their highest occupant loads.
Commercial rooftop units and split systems bear the full weight of that demand. Systems operating below capacity due to dirty coils, low refrigerant charge, or worn electrical components often fail during any early sustained heat event of the season. That pattern: deferred service meeting peak demand, is one of the most predictable causes of mid-summer HVAC failures in the North Bay.
The California Energy Commission’s Commercial End-Use Survey identifies HVAC systems, including space cooling, as among the top energy consumers in California’s commercial building sector. When systems aren’t properly maintained heading into summer, that cost reflects directly on monthly utility statements.
May and early June represent the right time to act. Service appointments are still available, replacement parts aren’t on backorder, and problems can be identified and resolved before summer heat puts systems under full load.

Your Pre-Summer Commercial HVAC Maintenance Checklist
Running through the following 12 tasks before summer arrives keeps systems operating at rated capacity and reduces the risk of unexpected downtime. Some items are appropriate for facility staff to handle. Others require a licensed, EPA-certified technician.
| Task |
Recommended Frequency |
Why It Matters |
| Air filter inspection and replacement |
Monthly to quarterly |
Restricted airflow forces systems to run harder and longer |
| Condenser coil cleaning |
Annually (pre-summer) |
Fouled coils reduce heat rejection and raise energy draw |
| Evaporator coil cleaning |
Annually |
Dirty coils cut cooling capacity and can cause system icing |
| Refrigerant level check and leak inspection |
Annually |
Low charge strains compressors and reduces cooling output |
| Electrical testing (contactors, capacitors, wiring) |
Annually |
Worn electrical parts are a leading cause of summer failures |
| Belt, motor, and bearing inspection |
Annually |
Mechanical wear causes inefficiency and unexpected shutdowns |
| Thermostat calibration and controls verification |
Seasonally |
Miscalibrated controls waste energy and reduce comfort consistency |
| Ductwork inspection for leaks and insulation gaps |
Every 2–3 years |
Leaky ducts can waste 20–30% of conditioned air before it reaches occupied zones |
| Condensate drain clearing |
Annually (pre-summer) |
Blocked drains cause water damage, mold growth, and system shutdowns |
| Damper function check |
Annually |
Failed dampers allow unconditioned air into occupied spaces |
| Outdoor unit clearance and debris removal |
Seasonally |
Blocked units overheat and lose efficiency under sustained load |
| Building automation system (BAS) verification |
Seasonally |
Incorrect scheduling and setpoints drive unnecessary energy costs |
Filter replacement, thermostat checks, and outdoor unit clearance are tasks facility staff can handle on a regular basis. Refrigerant handling, electrical diagnostics, and coil cleaning are a different matter. Under EPA Section 608 technician certification requirements, any technician who maintains, services, repairs, or disposes of equipment involving refrigerants must be certified – not just as a compliance formality, but to protect both the equipment and the people working on it.
What to Expect from Santa Rosa HVAC Contractors During a Commercial Tune-Up
A commercial HVAC inspection is a substantially different scope of work from a residential service call. Property managers who understand what a thorough inspection covers are far better positioned to evaluate proposals, ask the right questions, and hold contractors accountable for the work performed.
When Santa Rosa HVAC contractors arrive at a commercial property, a licensed technician should bring diagnostic tools capable of catching problems that a visual check alone would miss:
- Refrigerant analyzers to verify charge levels and detect active leaks
- Thermal imaging cameras to identify hot spots in electrical panels, ductwork, and mechanical components
- Amp draw meters to check that motors and compressors are operating within rated specifications
- Static pressure gauges to evaluate airflow distribution across duct systems
- Combustion analyzers for gas-fired rooftop units
Inspection duration depends on system count and size. A single packaged rooftop unit typically takes two to three hours. Properties with multiple zones should plan for a full-day engagement. Multi-building commercial portfolios often benefit from a service agreement that schedules inspections on a defined calendar throughout the year.
After the inspection, you should receive written documentation: a system condition report, photographs of components showing wear or failure, and a prioritized list of recommended repairs. That documentation supports capital planning conversations with ownership and protects property managers when tenants raise comfort complaints under their lease terms.
At North HVAC Services, our EPA-certified technicians provide written service reports on every commercial visit across Marin, Sonoma, and Napa counties. Clear documentation is a standard part of how we work – not an add-on.
The Real Cost of Skipping Summer HVAC Prep
Scheduling commercial HVAC maintenance before summer becomes a clear financial decision once you factor in what a mid-season failure actually costs – across emergency repairs, lost revenue, and accelerated equipment wear.
For restaurants, retail operations, and hospitality businesses, an HVAC failure during a July heat event doesn’t just create discomfort. A dining room reaching 85 degrees or a retail floor with no cooling drives customers out and, in some cases, forces a temporary closure. Emergency service calls carry premium rates, and parts availability during peak season can extend downtime by days.
On the energy side, the U.S. Department of Energy notes that simply replacing a clogged air filter with a clean one can lower an air conditioner’s energy consumption by 5 to 15 percent. Across an entire season of deferred maintenance – dirty coils, low refrigerant charge, worn components left unaddressed – the cumulative efficiency loss in commercial systems runs considerably higher. For a property operating multiple units through a full California cooling season, that gap shows up directly on monthly utility statements.
| Service Scenario |
Estimated Average Cost |
Notes |
| Scheduled annual tune-up (single unit) |
$150–$500 |
Per unit; varies by system size and contractor |
| Refrigerant recharge (per pound, R-410A) |
$100–$350 |
Higher when leak diagnosis and repair are included |
| Condenser fan motor replacement (emergency) |
$200–$500 |
After-hours and same-day labor premiums apply |
| Compressor replacement (mid-season failure) |
$800–$2,300+ |
Most costly single-component repair; commercial systems trend toward the higher end |
| Full rooftop unit replacement (emergency) |
$5,000–$15,000+ |
Varies by tonnage, brand, and installation complexity |
Cost estimates are based on HomeAdvisor HVAC repair data and industry cost references. Actual pricing varies by equipment type, location, labor rates, and emergency service requirements.
Property managers also carry lease and liability considerations. A documented service history is often the most straightforward line of defense when tenant comfort or air quality disputes arise under a lease agreement. Systems without regular service can accumulate microbial growth on coils and drain pans, circulating contaminants through occupied office and retail spaces – a detail that increasingly comes up in lease conversations and tenant health discussions.

How to Choose an HVAC Contractor in Santa Rosa, CA, for Your Business
Finding reliable service often starts with a search for HVAC service near you, helping you to connect with local professionals. That can return a list of options quickly. Knowing how to evaluate those results is what actually protects your property, your tenants, and your operating budget.
Here’s what to verify before committing to a service agreement:
- California C-20 license: HVAC contractors in California must hold a C-20 Warm-Air Heating, Ventilating, and Air-Conditioning license. Verify any contractor’s active status through the CSLB’s HVAC contractor licensing page, where you can confirm the license is current and in good standing.
- EPA Section 608 certification: Required by federal law for any technician handling refrigerants. This is a baseline requirement for commercial work, not a bonus credential.
- Manufacturer authorizations: Dealer authorizations from Trane, Mitsubishi, or Day & Night signal technicians trained to manufacturer service standards. North HVAC Services holds Authorized Factory Dealer status for both Trane and Day & Night, along with Diamond Authorized Dealer status for Mitsubishi: credentials that directly protect equipment warranties and confirm a higher level of technician training.
- Commercial liability insurance and bonding: Verify that coverage levels are appropriate for your property type and tenant occupancy.
- Service contract structure: Understand what the annual fee covers, what gets billed separately, response time commitments for emergency calls, and whether after-hours service is included.
- References from comparable commercial accounts: Experience with multi-unit commercial properties is meaningfully different from residential service work. Ask specifically for similar-sized commercial references.
Finding the right HVAC contractor in Santa Rosa, CA, for a commercial property takes more than checking a star rating. The credentials above represent the minimum standard for work that protects your equipment, your lease obligations, and the people inside your building.
How often should a commercial HVAC system be serviced?
Most commercial systems benefit from at minimum two inspections per year – one before the cooling season and one before the heating season. High-use applications, including restaurants, medical facilities, and 24-hour operations, often require quarterly visits to maintain performance and meet applicable health and safety requirements.
What does a commercial HVAC maintenance contract typically include?
A standard HVAC maintenance contract covers two scheduled inspections annually, filter replacements at each visit, coil cleaning, electrical component testing, refrigerant level verification, and priority scheduling for service calls. Many agreements also offer discounted labor and parts rates for repairs identified during planned inspection visits.
Can routine maintenance actually lower commercial energy bills?
Yes. Clean coils, properly charged systems, calibrated controls, and unobstructed airflow all contribute to a system running at rated efficiency. A system losing efficiency each year from deferred maintenance will show measurable cost differences on monthly utility statements – particularly across a full California cooling season.
Get Your Marin County Business Summer-Ready with North HVAC Services
The pre-summer service window in Marin County is short. Once late June arrives, booking a licensed commercial HVAC inspection becomes considerably harder, and waiting becomes more expensive.
North HVAC Services has served commercial and residential clients across Marin, Sonoma, and Napa counties since 1988. Our team includes EPA-certified technicians, Authorized Factory Dealers for Trane and Day & Night, and Diamond Authorized Dealer status for Mitsubishi – meaning every inspection is backed by manufacturer-trained technicians, not just general trade knowledge.
To schedule your pre-summer commercial inspection, explore our commercial HVAC services and maintenance tune-up programs, or request a maintenance contract quote. Call us directly at (415) 845-6910 (Marin County); (707) 430-3360 (Sonoma County) or email northhvacservices@gmail.com. You can also visit our Contact Page to get started. Your cooling season is coming – let’s get ahead of it.
May 16, 2026 | HVAC
Why Ductwork Design Is a Key Factor in Home Comfort
Your heating and cooling system depends on good ductwork design for consistent comfort in every room. When people think of HVAC, they often picture furnaces, air conditioners, or thermostats. But the invisible network of ducts running through walls and ceilings is just as important for indoor comfort. If you want to improve your home’s feel, start by understanding the connection between ductwork and home comfort.
Poorly designed ductwork can rob your HVAC system of its effectiveness, even if you have top-tier equipment. Imagine a home where the bedrooms are always chilly, but the living room is stuffy. Or a business where one office never cools down. These problems often trace back to issues with ductwork design, not your furnace or AC unit.
- Uneven temperatures: Bad ductwork causes frustrating hot and cold spots.
- Excessive noise: Undersized or poorly placed ducts can amplify sound.
- High energy bills: Leaks and poor layout waste energy, costing you money.
- Poor air quality: Dust, allergens, and outdoor air can sneak in through gaps.
North HVAC Services has seen businesses in Petaluma deal with these issues. One local retail shop struggled with musty air and constant temperature complaints from employees. After a duct redesign, airflow balanced out and comfort complaints dropped by half.
Well-designed ductwork is not just about moving air. It’s about delivering the right amount, at the right temperature, to the right place—quietly and efficiently. Every detail from duct size to route affects your daily comfort and your bottom line as a business owner.
For further reading, see Minimizing Energy Losses in Ducts from the U.S. Department of Energy.
Airflow Balance: The Role of Duct Sizing and Layout
Balanced airflow is the foundation of comfort in any building. If your ductwork is too small, too big, or arranged poorly, you’ll run into problems. The main goal: deliver the correct amount of air to each space, so your HVAC system doesn’t work harder than it should.
Why Duct Sizing Matters
If ducts are too small, air moves too fast and makes noise. If they’re too large, air slows down and may not reach distant rooms. Both situations create discomfort. For example, a restaurant owner in Petaluma noticed customers avoided certain dining areas in summer. The culprit? Undersized ducts that couldn’t deliver enough cool air.
- Undersized ducts: Restrict airflow, strain the HVAC unit, and cause noisy air movement.
- Oversized ducts: Reduce air pressure, slowing air delivery and causing uneven temperatures.
How Layout Affects Comfort
The way ducts branch out matters. Long, winding runs or too many turns can weaken air pressure. Each bend or split in the ductwork adds resistance, meaning less air reaches the endpoint. A good design uses straight, insulated runs and minimizes sharp turns. In a local office remodel, North HVAC Services found that relocating a few key ducts improved airflow to workstations by over 40%.
- Keep runs as short and direct as possible.
- Limit the number of elbows and branches.
- Balance supply and return ducts for even air distribution.
Have you ever walked into a room that feels stuffy or stale, even though the HVAC is running? That’s a sign your ductwork and home comfort are out of sync due to poor sizing or layout.
Temperature Consistency: Preventing Hot and Cold Spots
Nothing frustrates employees or customers more than rooms that are too hot or too cold. Inconsistent temperatures are one of the most frequent complaints North HVAC Services hears from business owners in Petaluma. These uneven spots are almost always tied to ductwork design.
Common Causes of Hot and Cold Spots
- Unbalanced supply and return ducts: Some areas receive more or less air than needed.
- Poorly placed vents: If vents are too close to windows or blocked by furniture, air can’t circulate properly.
- Long duct runs: Distant rooms often get less conditioned air.
For instance, a small retail store had a storage room that was always much colder than the sales floor. The cause? The only supply vent was at the far end of a long duct run with several sharp bends. By adding a return duct and repositioning the supply, the owner saw immediate improvements.
How to Achieve Consistency
- Design each duct run to handle the heating/cooling load of its specific room.
- Use manual dampers or smart zoning systems to control airflow.
- Check for obstructions like furniture, shelving, or blocked vents.
Are you dealing with temperature swings in your building? Addressing ductwork and home comfort together can make every area feel just right—without overworking your HVAC system.
Duct Leaks and Sealing: Their Direct Impact on Comfort
Even the best HVAC system can’t perform if your ducts leak air. Studies show that up to 30% of air can escape through unsealed joints, holes, or disconnected sections. That’s air you paid to heat or cool, lost before it reaches its destination.
How Leaks Affect Comfort and Costs
- Wasted energy: Your system runs longer, using more electricity or gas.
- Uneven temperatures: Less air reaches certain rooms, causing hot/cold spots.
- Poor air quality: Leaks in attics or crawl spaces pull in dust, pollen, and insulation fibers.
One local bakery had persistent humidity and dust problems in their kitchen area. North HVAC Services discovered several leaking duct joints above the drop ceiling. After professionally sealing the ducts, both air quality and temperature stability improved dramatically.
Identifying and Fixing Leaks
- Look for visible gaps, disconnected segments, or tape that’s dried out.
- Feel for air escaping at duct joints while the system runs.
- Hire a pro to perform a duct leakage test if problems persist.
Sealing leaks with mastic or metal tape—not common duct tape—can save serious money on energy bills. If you’ve never had your ductwork inspected, you might be losing comfort and dollars without realizing it.
Insulation and Duct Placement: Keeping Conditioned Air at the Right Temperature
Even perfectly sealed ducts can underperform if they aren’t insulated or are installed in the wrong places. The temperature of air inside the duct can change before it ever reaches your rooms, especially if ducts run through unconditioned spaces like attics or crawl spaces.
Why Insulation Matters
- Prevents heat loss in winter: Warm air traveling through cold spaces loses heat, cooling before it’s delivered.
- Keeps air cool in summer: Cold air can warm up in hot attics, making the AC work harder.
For example, a Petaluma salon noticed the back rooms were always stuffy in summer, despite strong airflow. The cause was uninsulated ducts running through a sun-baked attic. Wrapping those ducts in insulation kept the air cool all the way to the vents, improving customer comfort.
Best Practices for Duct Placement
- Route ducts through conditioned space whenever possible.
- Insulate any ductwork located in unconditioned areas.
- Keep ducts away from sources of heat or cold, like exterior walls or roofs.
Have you checked your attic or crawl space for exposed ductwork? Insulation and smart placement are simple ways to improve both ductwork and home comfort, especially in older buildings.
Noise Levels: How Ductwork Design Affects Sound in Your Home
No one wants to hear rattling, whistling, or booming every time the HVAC kicks on. Ductwork design plays a big part in how much noise you notice. Undersized ducts, sharp bends, or thin materials can all amplify sound.
Common Noise Problems
- Whistling: Air forced through narrow ducts or small vents makes high-pitched noise.
- Popping: Metal ducts expand and contract, causing sudden sounds.
- Rattling: Loose ducts or poorly supported runs vibrate with airflow.
One small office in Petaluma had a meeting room no one wanted to use because of constant duct noise. North HVAC Services traced the problem to undersized ducts and a poorly supported run above the ceiling tiles. By upsizing the ducts and securing them, noise dropped to a barely noticeable hum.
Tips to Reduce Duct Noise
- Use properly sized ducts to reduce air velocity.
- Install flexible connectors and sound-dampening insulation.
- Support ducts with hangers to prevent vibration.
- Design gradual turns instead of sharp elbows where possible.
If your building is quiet when the HVAC is off, but noisy when it runs, your ductwork and home comfort could benefit from a design review.
Indoor Air Quality: Duct Design’s Role in Clean, Healthy Air
Good duct design does more than deliver heating and cooling—it also protects air quality. Ducts that are dirty, leaky, or poorly designed can spread dust, allergens, and even odors throughout your space. This is especially important for businesses where a healthy environment is essential for employees and customers.
Design Issues That Affect Air Quality
- Leaky ducts: Draw in dust, mold spores, and insulation fibers from attics or crawl spaces.
- Poorly placed returns: Pull air from dirty or humid areas, spreading contaminants.
- Hard-to-clean layouts: Ducts with sharp bends or inaccessible sections collect debris.
A medical office in Petaluma saw a spike in allergy complaints after a remodel. North HVAC Services found that new return ducts were pulling air from a musty storage area. By relocating the returns and sealing the ducts, indoor air quality improved and complaints stopped.
Steps to Ensure Healthy Air
- Seal all duct joints to prevent contaminant entry.
- Place return ducts in clean, central locations away from sources of dust or moisture.
- Schedule regular duct cleaning, especially after construction or renovations.
Have you noticed more dust, odors, or allergy symptoms in your building? Your ductwork and home comfort could be at risk from poor air quality due to design flaws.
Ductwork and Home Comfort Complaints: What Homeowners Experience and How Design Fixes It
Most comfort complaints trace back to ductwork issues—even if the symptoms seem unrelated. North HVAC Services often hears:
- “The back office is freezing, but the lobby is too hot.”
- “The AC runs all day, but it never feels cool.”
- “There’s a musty smell coming from the vents.”
- “I hear rattling in the ducts whenever the heat turns on.”
Each of these has a duct design solution:
- Temperature imbalances: Fix by resizing ducts, adding returns, or installing dampers.
- Weak airflow: Address with layout improvements, leak sealing, or fan upgrades.
- Odors and dust: Seal leaks and relocate returns away from problem areas.
- Noise: Upsize ducts, add sound insulation, and secure loose segments.
For example, a Petaluma coworking space had constant complaints about stuffy conference rooms. By redesigning the ductwork and adding zoning controls, North HVAC Services helped them achieve balanced temperatures and quiet operation—boosting tenant satisfaction.
If you hear complaints or notice discomfort in your building, don’t assume you need new equipment. Often, improving the ductwork and home comfort together can solve the problem faster and for less money.
Ready to Improve Your Ductwork and Home Comfort?
Are you tired of uneven temperatures, noise, or air quality problems in your business or home? The right ductwork design can solve these issues and make your space more comfortable, efficient, and healthy. North HVAC Services specializes in ductwork and home comfort solutions tailored for Petaluma and the North Bay. Call (415) 845-6910 today to schedule a duct inspection or comfort consultation. Let us help you create a space where every room feels just right.
Frequently Asked Questions
How can I tell if my ductwork is affecting my home’s comfort?
If you notice uneven temperatures, stuffy rooms, or higher energy bills, your ductwork might be the culprit. Common signs include hot or cold spots, excessive HVAC noise, and visible dust around vents.
Will redesigning my ductwork really improve air quality and comfort?
Yes, updating poorly designed ductwork can significantly boost air quality and even out temperatures throughout your home. Sealing leaks and optimizing airflow helps your HVAC system work more efficiently and keeps every room comfortable.
How do I know if my ductwork needs to be replaced or just repaired?
A professional HVAC inspection can identify whether your ducts have minor leaks that can be sealed or if they are undersized, damaged, or too outdated to function well. North HVAC Services in Petaluma can assess your system and recommend the best solution.
Can fixing my ductwork lower my energy bills?
Absolutely—leaky or badly designed ducts force your HVAC system to work harder, driving up your energy costs. Repairing or redesigning ductwork can improve efficiency and lead to noticeable savings on your utility bills.
Who should I contact for ductwork design or repairs in Petaluma?
For expert ductwork design or repair in Petaluma, reach out to North HVAC Services at (415) 845-6910. Their team can help diagnose your comfort issues and offer effective, lasting solutions.

May 11, 2026 | HVAC
What SEER Ratings Actually Mean for Your Energy Bills
When you shop for a new air conditioner or heat pump, you’ll see “SEER rating” featured in every product description. SEER stands for Seasonal Energy Efficiency Ratio. It measures how efficiently an HVAC system uses electricity to cool your space during a typical cooling season.
Why does this matter for your business? SEER ratings and energy savings go hand-in-hand. The higher the SEER number, the more cooling you get per unit of energy. That means less wasted electricity—and lower utility bills.
Here’s how SEER is calculated: the total cooling output (in BTUs) over a season is divided by the total electric energy input (in watt-hours). For example, if two air conditioners both cool your office for the summer, but one uses much less energy to do so, it’ll have a higher SEER rating.
- Low SEER (10-13): Older, less efficient units. These systems require more energy to deliver the same cooling.
- Mid SEER (14-17): Standard efficiency for most new installations.
- High SEER (18+): Premium, high-efficiency systems with advanced features.
SEER ratings are not just a number on a sticker—they directly affect your monthly cash flow. Choosing the right SEER can lead to tangible energy savings every single month. Have you looked at your last summer’s utility bill? Imagine reducing that by 20% or more, just by understanding what SEER means and how it impacts your HVAC costs.
For further reading, see SEER Ratings and Your Home from homes.rewiringamerica.org.
How SEER Ratings and Energy Savings Are Linked
SEER ratings and energy savings connect directly. The higher the SEER, the less electricity your HVAC system consumes for each unit of cooling. This is not theory—it’s how your energy bills are calculated.
Let’s break it down with a simple example. Suppose you run your business’s air conditioning for 1,000 hours each summer. If you upgrade from a 10 SEER to a 16 SEER unit, the new system will use about 37% less energy to provide the same comfort.
- Annual operating cost for 10 SEER unit: $1,000 (hypothetical for illustration)
- Annual operating cost for 16 SEER unit: About $630
- Annual savings: Around $370
Multiply those savings over the 10–15-year lifespan of a quality system, and you can easily see thousands of dollars in reduced expenses.
But the benefits don’t stop there. High-SEER systems often come with:
- Better humidity control
- Quieter operation
- Improved comfort and air quality
For business owners in Sonoma, Marin, or Napa, where cooling costs can spike during hot stretches, the right SEER rating is a practical way to manage energy use—and keep more profit in your pocket. Are you maximizing your HVAC investment, or paying for wasted energy month after month?
Calculating Your Potential Savings with Different SEER Ratings
Understanding SEER ratings and energy savings isn’t just about theory—it’s about real dollars. Let’s talk specifics. How much can you actually save by choosing a higher SEER unit?
First, gather these basics:
- Your current air conditioner’s SEER rating
- Your average summer monthly electricity bill
- The number of cooling months per year
Let’s use a realistic scenario for a small office in Petaluma:
- Current AC: 12 SEER, costs $250/month for cooling (June–September)
- Considering upgrade to 16 SEER
Here’s how to estimate your potential savings:
- Find the efficiency ratio: 12 SEER to 16 SEER is a 33% efficiency gain (16 ÷ 12 = 1.33).
- Estimate new cost: $250 ÷ 1.33 ≈ $188/month.
- Monthly savings: $62.
- Seasonal savings (4 months): $248.
- 10-year savings: $2,480, not including any rate hikes.
Want a more precise estimate? North HVAC Services can analyze your current usage and local energy rates to give you a custom report.
Improved SEER ratings reduce your operational costs, free up budget for other business needs, and even qualify you for utility rebates. Are you leaving annual savings on the table?
Comparing SEER Ratings: 15 SEER vs 17 SEER and Beyond
Many business owners wonder if upgrading from a 15 SEER to a 17 SEER system is really worth it. The answer depends on your usage patterns, climate, and budget.
Let’s compare a 15 SEER and 17 SEER system for a typical 2,000 sq ft office in Marin County. Both units run an average of 1,200 cooling hours per year, with an average load of 3 tons (36,000 BTU/hr). The local electricity rate is $0.30/kWh.
| SEER Rating |
Annual Energy Use (kWh) |
Annual Cost ($) |
| 15 SEER |
8,640 |
2,592 |
| 17 SEER |
7,620 |
2,286 |
In this scenario, the 17 SEER unit saves $306 per year. Over 12 years, that’s $3,672 in energy savings—before any utility rate increases.
- Go higher than 17 SEER? Savings continue to increase, but the upfront cost rises too. For businesses with high cooling demands, 18–20 SEER can pay off.
- Lower usage? The difference narrows, but over a decade, even $100/year adds up.
Always compare the initial investment to lifetime savings. North HVAC Services can help you run the numbers for your building and usage.
How Old HVAC Systems with Low SEER Drain Your Wallet
If your HVAC system is more than 10–15 years old, its SEER rating is probably well below today’s standards. Many older units are rated 8–10 SEER, and as they age, they lose efficiency due to wear, leaks, and outdated technology.
Here’s what that means for your business:
- High monthly bills: Running a 10 SEER system costs about 40% more than a 16 SEER system for the same cooling output.
- Frequent repairs: Older systems break down more often, leading to higher maintenance costs and lost productivity.
- Poor comfort: Uneven cooling, noisy operation, and unreliable performance can disrupt your workspace.
Consider this example: A business in Sonoma using a 10 SEER unit pays $300/month for summer cooling. Upgrading to a 16 SEER system would drop that to about $188/month—a $112 monthly savings, or $448 each summer.
Old, low-SEER systems are a hidden drain on your profit. How much longer will you let wasted energy eat into your bottom line?
Choosing the Right SEER Rating for Sonoma, Marin, and Napa Homes
Every region has unique needs. In Sonoma, Marin, and Napa counties, hot spells can drive energy costs up fast. How do you choose the best SEER rating for your building?
Here’s what to consider:
- Climate: These counties see extended warm weather. Higher SEER ratings provide faster payback.
- Usage hours: Businesses with longer operating hours or lots of electronics benefit more from high-SEER units.
- Upfront budget: High-SEER systems cost more initially but pay off over time through lower bills.
- Utility rebates: Local programs often reward higher-SEER installations with cash incentives.
- Future-proofing: Energy codes are tightening. Higher SEER means your system will stay compliant longer.
Most commercial spaces should consider 16 SEER as a minimum. For high-usage environments, 18 SEER or above makes sense. North HVAC Services can recommend the right SEER based on your specific square footage, usage, and budget. Have you reviewed your options with a local HVAC expert?
Common Myths About SEER Ratings and Energy Savings
Misconceptions about SEER ratings and energy savings can lead to costly decisions. Let’s clear up a few myths:
- Myth 1: “A higher SEER always means massive savings.”
Not always. Savings depend on your current system, usage patterns, and local rates. Upgrading from 14 to 16 SEER saves less than jumping from 10 to 16.
- Myth 2: “SEER is the only factor that matters.”
Proper installation, ductwork, and maintenance affect real-world savings. A high-SEER unit with bad airflow won’t deliver on its promise.
- Myth 3: “If my old system works, I should keep it.”
Functioning does not equal efficient. An old 10 SEER unit can quietly drain thousands from your budget over time.
- Myth 4: “All high-SEER systems are expensive.”
Prices have come down, and utility rebates can offset much of the extra cost. Always compare total cost of ownership, not just sticker price.
Don’t let myths hold you back from energy savings. Ask questions and review your options with a trusted local contractor.
How North HVAC Services Helps You Maximize SEER Savings
Choosing the right SEER rating for your business is just the first step. North HVAC Services works with business owners across Petaluma, Sonoma, Marin, and Napa to ensure you get the most from your HVAC investment.
Here’s how we help you capture every possible energy savings:
- Expert recommendations: We analyze your building, current usage, and budget to suggest the ideal SEER rating for your needs.
- Quality installation: Proper sizing and installation maximize efficiency—no wasted energy, no premature wear.
- System upgrades: We can replace old, low-SEER units or retrofit existing systems for better performance.
- Maintenance plans: Regular tune-ups keep your system running at peak SEER efficiency year after year.
- Utility rebate guidance: We help you apply for available incentives to lower your project cost.
Are you ready to take control of your energy bills with a high-efficiency HVAC system? Contact North HVAC Services today at (415) 845-6910. Let us show you how the right SEER rating can deliver real savings, comfort, and peace of mind for your business.
Frequently Asked Questions
What does a SEER rating mean for my energy bills?
A SEER rating tells you how efficiently your air conditioner or heat pump converts electricity into cooling. The higher the SEER number, the more energy you save, which translates directly to lower monthly utility bills—sometimes by 20% or more compared to older, low-SEER units.
How much can I actually save by upgrading to a higher SEER air conditioner?
Upgrading from an older unit with a SEER of 10-13 to a new system with a SEER of 16 or higher can cut your cooling costs by 20-40%. For a more personalized estimate, North HVAC Services can review your current energy usage—just call (415) 845-6910 to get started.
Is a higher SEER rating always better for my business in Petaluma?
While higher SEER ratings mean more energy efficiency, the best choice depends on your budget and how often you use your HVAC system. In Petaluma's climate, a mid-to-high SEER unit often provides the best balance of upfront cost and long-term savings.
How do I know what SEER rating my current system has?
You can usually find your unit’s SEER rating on a sticker attached to the side of the condenser or in the product manual. If you’re unsure, North HVAC Services can help identify your system’s rating and suggest energy-saving upgrades.
Are there rebates or incentives for installing high-SEER HVAC systems?
Yes, many utility companies and government programs offer rebates for upgrading to high-SEER HVAC equipment. Check with your local utility provider or ask North HVAC Services about current incentives available in the Petaluma area.

Apr 20, 2026 | Air Quality, HVAC
Why Winter Makes High Indoor Air Quality Harder
When it comes to improving indoor air quality winter, every winter, business owners across Petaluma face a hidden challenge: keeping indoor air clean and healthy. Improving indoor air quality during winter isn’t just a comfort issue—it’s essential for employee health, productivity, and customer satisfaction. When temperatures drop, you keep doors and windows closed to conserve heat. This traps air inside, along with any pollutants, dust, and allergens. The result? Stale, contaminated air that can cause problems for everyone in your building.
The problem intensifies as outdoor air exchange slows. According to the EPA, indoor air can be two to five times more polluted than outdoor air, especially in winter. Why? Your building acts like a sealed container. With less fresh air coming in, contaminants from daily activities build up. Cleaning agents, office equipment, and even people all release particles and gases that linger longer in winter.
Have you noticed more dust on surfaces or a lingering musty smell in your space during the colder months? These are signs the air isn’t circulating well. Some people even experience more headaches or respiratory irritation in winter—often caused by poor indoor air quality. If you want to keep your staff healthy and operations running smoothly, understanding these seasonal challenges is the first step.
- Windows and doors stay shut, reducing fresh air exchange.
- Heating systems stir up dust and spread it throughout your building.
- Lower humidity dries out mucous membranes, making occupants more susceptible to illness.
- Pollutants from cleaning, cooking, and even office equipment have nowhere to go.
The Role of Heating Systems in Winter Air Quality Challenges
Your heating system is essential for comfort, but it can also impact air quality in ways you might not expect. Most commercial buildings in Petaluma rely on forced-air furnaces or heat pumps during winter. These systems circulate warm air throughout your property, but they also move dust, dander, and other particles from room to room.
Have you ever switched on the heat for the first time in months and noticed a burning smell or an uptick in sneezing? That’s often dust and debris that settled in the ducts over summer, now being blown into the air. Without regular maintenance, filters become clogged, reducing the system’s ability to trap pollutants. As a result, more particles stay airborne, worsening air quality.
Some older heating systems, especially those using combustion (natural gas or oil), can introduce carbon monoxide or nitrogen dioxide if not properly maintained. Even electric systems, while cleaner, don’t filter or refresh air without the right accessories.
- Dirty or clogged filters reduce your HVAC system’s effectiveness at capturing pollutants.
- Poorly maintained ductwork can harbor mold, dust, and bacteria.
- Combustion-based heaters can leak harmful gases if there are cracks or blockages.
- Improper air balancing can cause stagnant zones where pollutants concentrate.
Working with a local expert like North HVAC Services can help you identify and address these system-specific air quality issues before they affect your team or customers.
Humidity Drops and Dry Air: A Winter-Specific Problem
For those concerned with improving indoor air quality winter, winter air is naturally drier, and indoor heating systems make the problem worse. As you heat the air, relative humidity falls. This creates a range of issues for your business environment and for anyone spending time inside.
For further reading, see Staying Safe from Indoor Air Pollution This Winter from lung.org.
Low humidity dries out skin, eyes, and sinuses, making employees more vulnerable to colds and respiratory irritation. Static electricity increases, which can damage sensitive electronics and create discomfort. Dry air also causes wood furniture, floors, and even musical instruments to crack or warp—potentially leading to costly repairs.
What’s the ideal indoor humidity? Most experts recommend keeping it between 30% and 50%. Yet, during a typical Petaluma winter, indoor humidity levels can drop below 20%, especially in tightly sealed buildings. This makes improving indoor air quality in winter especially challenging.
- Dry mucous membranes mean less protection from viruses and allergens.
- Dry air can increase the survival time of airborne viruses.
- Paper products, artwork, and certain inventory can suffer damage.
- Employee comfort and morale can dip as physical discomfort rises.
Humidifiers—either portable or integrated into your HVAC system—can help manage this. But it’s important to monitor humidity closely. Too much moisture can create its own set of problems, such as mold growth. Striking the right balance is key.
Reduced Ventilation and Its Impact on Pollutant Buildup
One of the main reasons winter air quality is tougher to maintain is reduced ventilation. Ventilation refers to the process of exchanging indoor air with fresh outdoor air. In summer, you might leave windows or doors open, but winter weather means everything stays tightly closed. This limits the natural flow of fresh air and allows contaminants to build up quickly.
Mechanical ventilation—like exhaust fans and air exchange systems—can help, but many commercial buildings either lack these systems or don’t use them effectively. If your business is in an older building, you may rely on “leakiness” (drafts) for ventilation, but newer buildings are designed to be airtight for energy efficiency. While this saves on heating costs, it also reduces natural air exchange.
- CO2 levels rise when ventilation is reduced, leading to drowsiness and headaches.
- Volatile organic compounds (VOCs) from office equipment, cleaning supplies, and furnishings accumulate.
- Allergens and dust mites stay suspended in the air longer.
- Odors linger, creating an unpleasant environment for staff and clients.
If you notice your workplace feeling stuffy or have employees complaining about fatigue or discomfort, poor ventilation could be the cause. This is a common issue that North HVAC Services helps address for local business owners.
Sources of Indoor Pollutants That Worsen in Winter
For those concerned with improving indoor air quality winter, many indoor pollutants become more concentrated in winter due to reduced ventilation and increased indoor activities. Some sources are obvious, while others are easy to overlook. Understanding where these pollutants come from can help you address them directly:
- Heating appliances: Gas or oil furnaces can emit carbon monoxide, nitrogen dioxide, and particulates if not properly maintained.
- Cleaning products: Disinfectants, sprays, and air fresheners release volatile organic compounds (VOCs) into the air.
- Office equipment: Printers, copiers, and computers can emit ozone and fine particles, especially in enclosed spaces.
- Building materials and furnishings: Carpets, paint, and new furniture off-gas chemicals that stay trapped indoors.
- People and pets: Humans shed skin cells and hair; pets add dander and sometimes odors.
- Cooking: Kitchens without proper exhaust venting can fill the air with grease, smoke, and odors.
- Mold and dust: Even in winter, damp areas (like basements) can foster mold, while dust mites thrive in soft furnishings.
Take a walk around your business. Where are the cleaning supplies stored? Are staff eating at their desks or using a break room without ventilation? Each of these habits can add to the winter air quality challenge.
Health Effects Linked to Poor Winter Air Quality
Poor indoor air quality isn’t just uncomfortable—it can impact health, productivity, and your bottom line. In winter, symptoms often increase because pollutants concentrate and humidity drops. Here’s what to watch for:
- Short-term effects: Headaches, eye irritation, sore throat, coughing, and fatigue are common complaints. These symptoms can mimic seasonal colds but may actually stem from air quality issues.
- Respiratory problems: Employees with asthma, allergies, or other respiratory conditions often experience flare-ups in winter. Dry air and airborne particles can trigger attacks or worsen symptoms.
- Increased illness: Viruses and bacteria can spread more easily when people spend more time indoors with less ventilation.
- Long-term risks: Prolonged exposure to certain indoor pollutants—like VOCs or carbon monoxide—can lead to chronic health problems, including respiratory disease and cardiovascular issues.
Have you noticed more sick days or reduced productivity during the colder months? These could be tied to air quality. Improving indoor air quality in winter can help reduce absenteeism and foster a healthier, more productive workplace.
Improving Indoor Air Quality in Winter: What Makes It Tricky?
Many business owners want to improve winter air quality, but face real obstacles. The cold weather means you can’t just open a window. Energy costs are a concern, and some solutions—like adding humidifiers—require ongoing maintenance. Here’s why improving indoor air quality in winter is especially challenging:
- Heating and ventilation systems often work against each other. Bringing in cold air means higher heating bills.
- Some air purifiers and humidifiers need regular cleaning and filter changes, which can be overlooked.
- Building design may not support modern air exchange systems without upgrades.
- Staff habits—like blocking vents or storing chemicals improperly—can undermine your efforts.
- Monitoring air quality requires tools and knowledge that many businesses don’t have on hand.
Even if you invest in an HVAC upgrade, you need to ensure it’s properly sized and maintained. This is where working with a trusted partner like North HVAC Services makes a difference. Our technicians help you balance comfort, cost, and healthy air—tailored to your unique business environment.
Practical Solutions to Overcome Winter Air Quality Challenges
Improving indoor air quality in winter doesn’t need to be overwhelming. With the right approach, you can create a healthier environment for employees and customers. Here are practical steps you can take right now:
- Schedule regular HVAC maintenance. Clean or replace filters every 1-3 months. Have your system inspected for leaks, buildup, or malfunctioning parts before the heating season starts.
- Upgrade to high-efficiency filters. Consider MERV 11 or higher filters for your furnace—these trap more small particles without restricting airflow. North HVAC Services can recommend the best options for your system.
- Add humidity control. Use portable or whole-building humidifiers to keep indoor relative humidity between 30% and 50%. Use a hygrometer to monitor levels.
- Increase ventilation strategically. Install energy recovery ventilators (ERVs) or open windows briefly at warmest times of day. Use exhaust fans in kitchens and restrooms.
- Control sources of pollutants. Store chemicals in sealed containers, limit use of air fresheners, and choose low-VOC cleaning products and paints.
- Clean regularly. Vacuum carpets and upholstery with HEPA-filtered vacuums. Wipe down surfaces to minimize dust and allergens.
- Monitor air quality. Use CO2, carbon monoxide, and humidity sensors to identify issues early. Address any alarms or abnormal readings promptly.
- Educate your team. Encourage good habits—like not blocking vents, reporting musty odors, and using exhaust fans when cooking or cleaning.
Don’t wait for complaints or illness to act. Contact North HVAC Services in Petaluma at (415) 845-6910 to schedule an indoor air quality assessment or to discuss upgrades for your business. A healthier workplace starts with the air you breathe every day.
Frequently Asked Questions
How can I improve indoor air quality in my office during winter?
To improve indoor air quality in winter, regularly replace HVAC filters, use air purifiers, and schedule routine maintenance for your heating system. These steps help reduce dust, allergens, and contaminants that build up when doors and windows stay closed.
Why does indoor air feel stuffier in winter, and what can I do about it?
Indoor air feels stuffier in winter because fresh air can’t circulate as easily with windows and doors closed. Combat this by running your HVAC system's fan occasionally, using exhaust fans in restrooms and kitchens, and considering a professional ventilation assessment from North HVAC Services.
Are there signs my indoor air quality is poor during winter?
Yes, common signs include more visible dust, musty odors, headaches, or increased respiratory irritation among employees. If you notice these, it’s a good idea to check your ventilation and consider a professional inspection.
How often should I change HVAC filters in winter to maintain good air quality?
During winter, it’s best to check your HVAC filters every month and replace them at least every 2-3 months, or more often if your space gets heavy use. Clean filters help trap pollutants and keep indoor air fresher.
Can North HVAC Services help improve my building’s indoor air quality?
Absolutely! North HVAC Services offers maintenance, filter replacement, and ventilation solutions to help keep your indoor air clean all winter long. Call (415) 845-6910 for a consultation tailored to your Petaluma business.

Apr 10, 2026 | HVAC, HVAC Maintenance
Spring represents the ideal window for air conditioning preparation in Santa Rosa, yet many homeowners delay servicing until temperatures spike. This timing difference often determines whether families enjoy uninterrupted cooling comfort or face emergency repair costs during Sonoma County’s hottest weeks.
Understanding when and how to service your cooling system can prevent the common scenario of discovering equipment failures on the year’s initial 90-degree day. North HVAC Services has observed consistent patterns in seasonal service demand that reveal why March and April appointments deliver better outcomes than waiting until summer arrives.
Why AC Maintenance Should Begin in March, Not June
The calendar matters more than homeowners realize when scheduling air conditioning service. Santa Rosa’s climate creates specific timing advantages that disappear once summer heat arrives.
Service Availability and Wait Times
March through early May represents the window when HVAC contractors maintain normal scheduling capacity. According to the U.S. Department of Energy‘s residential HVAC maintenance guidelines, preventive maintenance scheduled during off-peak periods allows for thorough inspections without the time pressures of emergency summer calls.
During the spring months, homeowners typically schedule appointments within 3-5 business days. By mid-June, that timeframe extends to 2-3 weeks as contractors work through backlogs of emergency calls. This delay means living without cooling during peak heat rather than addressing issues before they impact comfort.
Temperature Pattern Considerations
Historical climate data from Weather Spark for Santa Rosa shows the city typically reaches its first 85°F+ day between late April and mid-May. The first 90°F+ day usually occurs in late May or early June. Systems that haven’t operated for 6-8 months face higher failure rates during these initial startup cycles.
Equipment dormancy creates specific stresses. Refrigerant settles, lubricants thicken, and electrical components experience voltage surges after extended inactivity. Testing systems in March allows time to address these issues before they cause failures during actual cooling demand.
Parts and Supply Chain Factors
Spring service appointments benefit from full parts inventory at suppliers. Common components like capacitors, contactors, and fan motors are stocked at normal levels. Summer emergency repairs often require overnight shipping or multi-day waits for specialty parts, particularly for older system models.

What Professional Air Conditioner Maintenance Includes: The Complete 22-Point Inspection
Thorough “AC service near me” searches should identify contractors who perform systematic evaluations rather than cursory checks. Professional AC maintenance involves specific measurements and tests that homeowners cannot replicate with basic tools. North HVAC Services technicians follow manufacturer-specific protocols for each system brand we service.
Refrigerant System Verification
Technicians measure refrigerant charge using superheat and subcool calculations specific to each system’s design. Incorrect refrigerant levels reduce efficiency by 20% and accelerate compressor wear. This process requires specialized gauges and manufacturer specifications that vary by equipment brand and model.
Low refrigerant always indicates a leak, as systems are sealed and should never need “recharging” under normal operation. Professional service locates and repairs leaks rather than simply adding refrigerant that will leak out again.
Electrical Component Testing
Capacitors represent the most common failure point in air conditioning systems. These components provide starting and running voltage to motors but degrade over time regardless of usage. Testing reveals capacitance values before failures occur, preventing the $300-500 emergency service calls that result from capacitor-related breakdowns.
Contactors, relays, and wire connections undergo visual inspection and voltage testing. Pitted contactors or loose connections create resistance that generates heat, leading to component failures during high-demand periods.
| Component |
Normal Service Interval |
Failure Impact |
| Capacitors |
5-7 years |
System won’t start or runs inefficiently |
| Contactors |
10-12 years |
Prevents compressor operation |
| Condenser Fan Motor |
10-15 years |
Overheating and compressor damage |
| Evaporator Coils |
Clean annually |
30% efficiency loss when dirty |
Coil Cleaning and Airflow Measurement
Both evaporator (indoor) and condenser (outdoor) coils require cleaning to maintain heat transfer efficiency. Dirty coils force systems to run longer cycles to achieve set temperatures, increasing energy consumption and component wear.
Airflow measurement across the evaporator coil verifies proper CFM (cubic feet per minute) delivery. Systems designed for 400 CFM per ton of cooling capacity but delivering only 300 CFM indicate ductwork restrictions, undersized returns, or blower issues requiring correction.
Thermostat Calibration and Documentation
Thermostat sensors drift over time, causing temperature discrepancies between displayed and actual room conditions. A thermostat reading 72°F while the actual temperature measures 75°F forces systems to short-cycle without achieving comfort.
Professional service includes documentation of all measurements: refrigerant pressures, electrical voltages, temperature differentials, and airflow readings. This baseline data allows future comparisons that identify developing problems before they cause failures.
Common Problems Found During Santa Rosa AC Repair Inspections
Spring inspections consistently reveal issues that would cause mid-summer breakdowns if left unaddressed. Understanding these patterns helps homeowners recognize warning signs earlier.
Capacitor Degradation
Capacitors fail more frequently than any other air conditioning component. These cylindrical components store electrical charge to start and run motors, but their capacitance degrades approximately 5-7% annually regardless of system usage.
When capacitance drops below equipment specifications, motors struggle to start or run inefficiently. This creates amperage draw increases that accelerate compressor wear and can cause complete motor failures requiring expensive replacements. North HVAC Services carries common capacitor sizes on every service vehicle to provide same-visit replacements when needed.
Refrigerant Leaks and System Impact
The Environmental Protection Agency regulates refrigerant handling through Section 608 regulations due to environmental concerns, but leaks also create significant cost implications for homeowners. Systems low on refrigerant run longer cycles, consume more energy, and risk compressor damage from inadequate cooling.
Older systems using R-22 refrigerant face particularly high repair costs, as this phased-out refrigerant now costs $80-150 per pound compared to $20-30 for newer R-410A. A system requiring 3-4 pounds of R-22 to recharge may cost more than replacing the entire unit with modern equipment.
Compressor Starting Issues
Compressors that show hard-start characteristics during spring testing typically fail within the first month of regular summer operation. This condition develops when internal components wear, requiring more starting torque than capacitors can provide.
Adding hard-start kits can extend compressor life temporarily, but these symptoms often indicate replacement should occur on the homeowner’s timeline rather than during an emergency situation when options and negotiating power decrease.
Condensate Drainage Problems
Air conditioner maintenance must address the water removal systems that prevent flooding. Evaporator coils remove humidity from indoor air, generating 5-20 gallons of water daily during summer operation. This condensate drains through pipes that can develop blockages from algae growth, debris, or installation issues.
Blocked drains cause water backups that damage ceilings, walls, and flooring. Secondary drain pans and safety switches can prevent damage, but don’t address the underlying blockage requiring professional cleaning.
| Common Issue |
Typical Discovery Time |
Prevention Method |
| Capacitor failure |
During first hot-weather operation |
Annual spring testing and replacement |
| Refrigerant leaks |
When cooling becomes inadequate |
Pressure testing during tune-ups |
| Drain blockages |
After water damage occurs |
Annual drain cleaning and biocide treatment |
| Compressor wear |
Mid-summer breakdown |
Electrical testing and starting current measurement |
Ductwork Air Leaks
Even as California pours billions into clean energy and home efficiency, many houses lose a large portion of heated and cooled air through leaky, unsealed ductwork before it can be used indoors. This represents substantial wasted energy and reduced comfort.
Spring service should include duct inspection in accessible areas. Connections at registers, return grilles, and equipment often develop gaps that worsen over time from building settlement and temperature cycling.
DIY Pre-Season Checklist: What Homeowners Can Do Before Professional Service
Homeowners can perform basic preparation tasks that improve system performance and help professional technicians work more efficiently during scheduled maintenance appointments.
- Outdoor Unit Clearing: Condenser units require unrestricted airflow to reject heat effectively. Remove leaves, grass clippings, and debris from fins using a garden hose spray (never pressure washers, which bend delicate fins). Trim vegetation, shrubs, and tree branches to provide 24 inches of clearance on all sides of the unit.
Check that the concrete pad beneath the unit remains level. Settling that causes tilting can stress refrigerant lines and affect proper drainage from the unit.
- Air Filter Management: Standard 1-inch pleated filters require monthly inspection and replacement every 1-3 months, depending on household conditions. Homes with pets, construction projects, or high dust exposure need more frequent changes.
Dirty filters restrict airflow, forcing blower motors to work harder and reducing system capacity. A system designed to cool a home to 72°F might only achieve 75°F when filters are severely clogged.
- Indoor Register Maintenance: Walk through your home, checking each supply register (where cool air blows out) and return grille (where air returns to the system). Remove any furniture, drapes, or storage items blocking airflow. Vacuum register faces to remove dust buildup.
Close inspection often reveals temperature differences between rooms that indicate ductwork issues requiring professional assessment. One bedroom is significantly warmer than the others suggests supply duct problems affecting that area.
- Thermostat System Check: Replace thermostat batteries annually, even if low-battery warnings haven’t appeared. Test cooling mode by setting the temperature 3-4 degrees below the current room temperature and verifying the system starts within 30-60 seconds.
Listen for unusual sounds during startup and operation. Grinding, squealing, or banging noises indicate mechanical issues requiring immediate AC repair in Santa Rosa before continued operation causes additional damage.
Energy Efficiency Gains from Spring AC Tune-Ups
Regular maintenance delivers quantifiable energy savings that offset service costs while reducing environmental impact. Being aware of these benefits helps homeowners evaluate the return on investment from seasonal servicing.
Efficiency Degradation Patterns
A long-term field study of 56 Florida homes found that air conditioner and heat pump performance often declined over time, with many systems degrading by about 5% per year. A system operating at 95% of design efficiency in year two drops to 90% in year three without maintenance.
This degradation compounds over time. After five years without service, a system might operate at only 75-80% of its original efficiency, consuming 20-25% more electricity to provide the same cooling output. On a $200 monthly summer cooling bill, that represents $40-50 in unnecessary costs.
PG&E Rate Structure Considerations
Santa Rosa residents served by PG&E face electricity rates that can vary based on usage, season, and time of day. PG&E’s current residential summer pricing spans from roughly the low 30-cent range to just over 50 cents per kWh, depending on the rate plan and usage level.
Well-maintained systems that run more efficiently keep households in lower rate tiers, creating savings that exceed the direct energy consumption reduction. A system using 15% less electricity might reduce costs by 20-25% if that reduction prevents tier escalation.
SEER Rating Preservation
Air conditioners carry Seasonal Energy Efficiency Ratio (SEER) ratings indicating their efficiency under ideal conditions. A system rated 16 SEER delivers that efficiency only when properly maintained. Dirty coils, low refrigerant, or restricted airflow can reduce effective SEER to 12-13, equivalent to operating a much older, less efficient unit.
California Rebate and Incentive Programs
California property owners may be eligible for HVAC and home-energy rebates through utility programs, state-administered initiatives, and, in some areas, local air districts. Rebate requirements vary by program, but they often involve proof of purchase, installation details, equipment eligibility, and qualified contractor documentation. North HVAC Services assists customers with rebate documentation and qualification requirements for efficiency upgrade programs.
Recognizing Warning Signs That Require Immediate AC Repair in Santa Rosa
Some system behaviors indicate problems that will worsen rapidly without intervention. Recognizing these patterns helps homeowners distinguish between scheduling routine service and requesting urgent evaluation.
- Unusual Operating Sounds: Air conditioners should produce relatively consistent, quiet operation. New sounds indicate developing mechanical issues:
- Grinding: Bearings wearing in motors or compressor internal damage
- Squealing: Belt slippage (older systems) or bearing friction
- Banging/Clanking: Loose components or failed mounts
- Hissing: Refrigerant leaks or expansion valve issues
Continuing operation after unusual sounds develops risks of converting minor repairs into major component replacements.
- Airflow and Cooling Performance Issues: Weak airflow from registers despite the blower running suggests ductwork restrictions, blower motor problems, or evaporator coil icing. Uneven cooling between rooms indicates supply duct leaks, damper positions, or inadequate system capacity for the home layout.
Systems that run continuously without reaching thermostat settings demonstrate capacity problems. This might result from refrigerant loss, compressor wear, or undersized equipment for the cooling load.
- Short-Cycling Behavior: Normal cooling cycles run 12-18 minutes in moderate weather and 20-25+ minutes during peak temperatures. Systems starting and stopping every 5-10 minutes indicate thermostat problems, refrigerant overcharge, or oversized equipment.
Short-cycling accelerates component wear because starting represents the highest electrical stress and mechanical wear period. A system short-cycling 6 times per hour experiences starting stress equivalent to normal all-day operation.
- Electrical and Safety Concerns: Burning odors, circuit breaker trips, or visible sparking require immediate shutdown and professional evaluation. These symptoms indicate electrical failures that pose fire risks and will worsen with continued operation.
Musty or moldy odors when the system operates suggest biological growth in ductwork or drain pans. This affects indoor air quality and can aggravate respiratory conditions, particularly for children and sensitive individuals.
- Cost Analysis: Repair vs. Replacement: Spring tune-ups sometimes reveal damage beyond economical repair. Systems over 12-15 years old requiring compressor replacement, refrigerant conversions, or multiple component failures often make replacement more financially sound.
Secure Your Summer Comfort: Book Your Pre-Season AC Tune-Up with North HVAC Services
Santa Rosa homeowners who schedule spring air conditioner maintenance avoid the summer service delays and emergency repair premiums that affect those who wait for problems to develop. Our Santa Rosa AC Repair team brings Diamond Authorized Dealer status for Mitsubishi systems and Factory Authorized Dealer credentials for Trane and Day & Night equipment, which means we maintain factory-trained technicians with access to manufacturer technical support and genuine parts.
What Your Spring AC Maintenance Appointment Includes:
- Complete 22-point inspection with documented measurements
- Baseline performance data for your specific system
- Documentation valuable for warranty claims and efficiency rebate applications
- Professional evaluation of repair versus replacement economics
- Priority scheduling during March and April with experienced technicians
North HVAC Services schedules spring maintenance appointments Monday through Saturday, 6:00 AM to 6:30 PM, providing flexibility that accommodates work schedules.
Three Easy Ways to Schedule:
Don’t wait until the initial heat wave reveals problems that could have been prevented. Contact us today to protect your summer cooling comfort and avoid the emergency service delays that affect last-minute callers.